The Bus from the story has many names – The Magic Bus, The Stampede Trail Bus, the 142 Bus, Fairbanks Bus etc etc. What rings true with this bus is that it is very special. It has been made special by the story, the many visitors that go there, its remoteness and the feeling it gives those affected by this story. Unfortunately, some people have perished getting to the bus and so I feel it necessary to provide those wishing to visit the bus, some information.
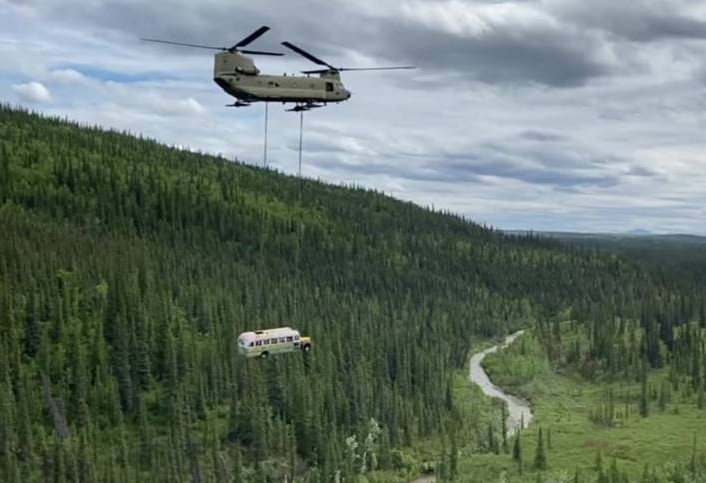
*Note* The Fairbanks City 142 Magic bus has been moved.
Bus 142 was removed from the Alaska wilderness in the summer of 2020 and later deposited at the University of Alaska Museum of the North for long-term curation and exhibition.
University of Alaska, Fairbanks Campus
1962 Yukon Drive
Fairbanks, AK 99775
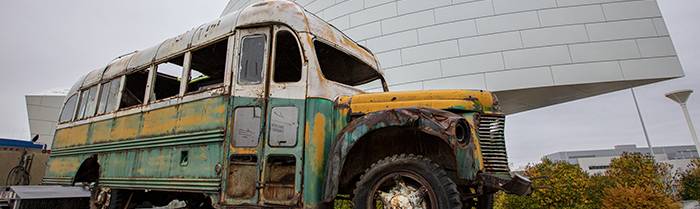
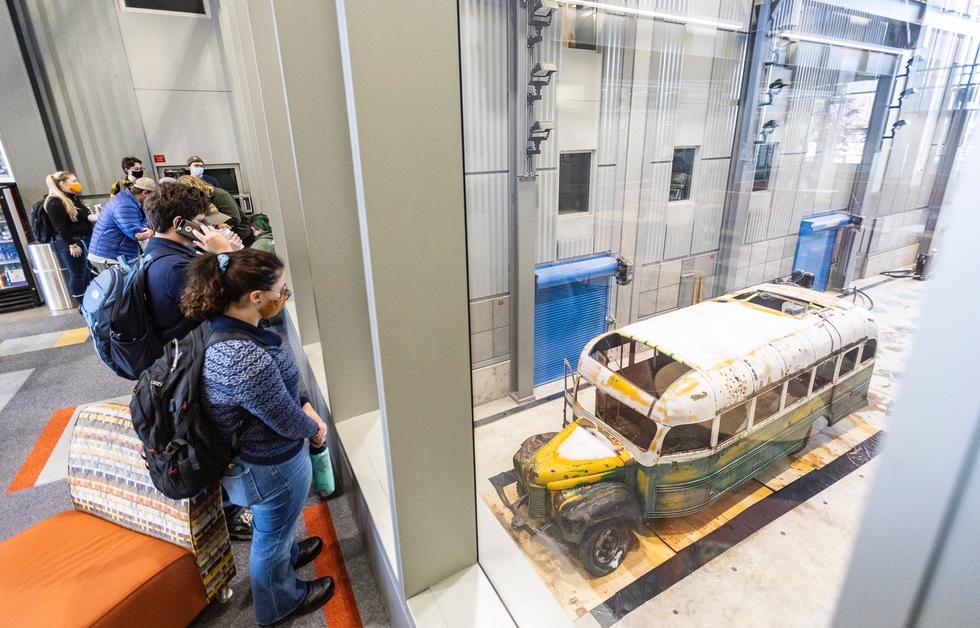
Restoring the Magic Bus to its early 90s condition, prior to it suffering further damage from vandalism, is a time-consuming endeavor. The restoration work is currently underway in the Engineering Building’s high-bay area, which features full glass walls and is open to the public for free from 8 am to 8 pm, Monday through Friday.
To get there, you can either take a shuttle bus from the museum or enjoy a 15-minute walk. For additional information, visitors can reach out to the museum at (907) 474-7505.
The final exhibit will be constructed in a protected and suitable outdoor location, with discussions ongoing about an accompanying indoor exhibit.
Once finished, the public will have free access to the exhibit(s) during regular museum hours.
https://www.uaf.edu/museum/collections/ethno/projects/bus_142/
Information from the University of Alaska about the 142 bus:
Thanks to a collaboration between the UAF’s Institute of Northern Engineering (INE) and the Arctic Infrastructure Development Center (AIDC), the general public can now visit the bus from 8:00 am to 8:00 pm, Monday to Friday, at the ConocoPhillips Alaska High Bay Structural Testing Lab located in the Joseph E. Usibelli Engineering Learning and Innovation Building (JUB) on the UAF campus. This opportunity is available until mid-September 2023.
This museum project will involve a multi-year effort to preserve the aging bus, which has endured years of vandalism. Additionally, teams will work on developing an interpretive approach that highlights different phases in the bus’s life. These phases include its role in the Fairbanks City Transit System during the 1950s, serving as a residence for a Yutan Construction Company mining road crew member in the early 1960s, providing shelter for hunters and back-country hikers during the 1970s and ’80s, and gaining fame as the final refuge of Christopher McCandless in 1992, a story made famous by Jon Krakauer’s 1996 book, “Into the Wild.”
The bus will be displayed in an outdoor area near the museum on the UAF campus, allowing visitors to safely explore its history for the first time in three decades.
Virtual bus: https://www.uaf.edu/museum/exhibits/virtual-exhibits/bus142/
Bus Supporter website: http://www.friendsofbus142.com/
Information about the 142 Fairbanks City bus original location.
Please note that we cannot be held responsible for your actions – if you decided to visit the bus, seek the appropriate advice from experts and speak to local authorities in Fairbanks.
Erik Halfacre has posted many valuable tips on the forum about the bus. He is an Alaskan himself and I feel his knowledge of the bus, its location and surroundings are very valuable. And so, here is some great information and useful tips from Erik… (there is also a great Youtube video he made at the end of the article.)

Hiking The Stampede Trail – Erik Halfacre
19th August 2010
The Stampede Trail to Bus 142 is becoming a more popular hiking destination these days. Virtually unheard of, to anyone outside the state of Alaska before Krakauer’s article in Outside Magazine, the trail has seen a vast increase in traffic since the release of Sean Penn’s film in 2007.
The story of Christopher McCandless, restless and footloose, stirs within many of us a hunger for adventure that is hard to quiet. I can’t begin to recall how many times I’ve heard, “Oh Man! I read that book! I really want to get out to that bus someday!” or “That movie was really great. I really want to see the bus.” The desire to see the bus, is often equated (in the minds of many Alaskans) to some kind of worship of Chris, or a celebration of naiveté. I feel this is an unfair characterization. For me, the desire to see the bus was rooted in my will to better understand his story.
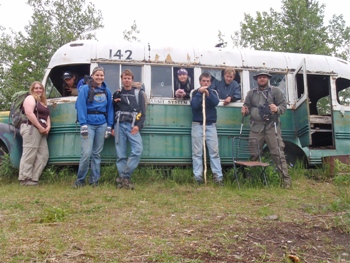
Some things cannot be adequately described in words. The bus is one of those things. You will not truly understand the conditions of Chris‘ experience until you sit down in the folding chair where there once was a driver’s seat and just absorb the feeling of silence and isolation. The feeling is both refreshing, and lonely. Even with seven other people in my group, I couldn’t help but feel a little lonely in that place.
When I first began planning for my own trek, in 2009, I tried to find information online. I think, partially due to local sentiment about the story, and partially due to the fact that at that time there really weren’t a heck of a lot of people headed out that way, It was darn near impossible to find any good information about the hike. All I found back then, was the Denali Chamber of Commerce page telling me how incredibly dangerous it is, and basically that they didn’t want to give out advice because they’d rather you didn’t go. That wasn’t enough to deter me though. I dug around until I found some coordinates for the bus and looked over the satellite imagery. I researched how to properly execute a crossing of a swift flowing river, and then practiced on some rivers of similar depth and speed nearer to my hometown of Palmer, Alaska.
After my hike I did more research on the subject, interviewed and emailed many others who had made the trek themselves, and turned my research into a ten minute video about doing the hike. Response to the video was encouraging, and it became obvious that there was a demand for this kind of information, so I turned the video into a whole website.
So, enough about Me, lets get to the good stuff; What you need to know to hike the Stampede Trail to Bus 142.
Overview
The Stampede Trail is long, wet, and buggy. On the upside, the terrain is mostly level. There aren’t really any long uphill sections worth noting. You’ll face two river crossings, a night or two in bear country, and swarms of mosquitoes that will try to pick you up and carry you away. Frequently you’ll find yourself wondering ‘is this the Stampede Trail, or Stampede River,‘ as you wade through flooded muddy trail up your knees.
How Do I Know if The Stampede Trail is Too Hard For Me?
The Stampede Trail is not for everyone. This is not a hike for beginners. No two ways about it. Despite how badly you may want to see the bus, if you are not a reasonably proficient hiker (someone with experience hiking 15+ miles a day for multiple days with a pack) then you are probably getting yourself in over your head. By putting yourself in that situation, you are pretty much ensuring that you will exert yourself beyond your safe limits. This leads to exhaustion. Exhaustion leads to lack of judgment. Lack of Judgement can lead to serious injury or death.
The good news is: if you are not much of a hiker right now… it doesn’t take much to build that kind of endurance up. Ramp up. Each weekend go on a hike that’s five miles longer than the last weekend’s hike. If you start with a five mile hike today, and follow that plan, you’ll be up to forty miles within two months assuming you already have some reasonable level of fitness. Hike with a pack. Even on day hikes, throw some soup cans in a bag and hit the trail. The more fit you are, the more you are likely to have the endurance to get yourself out of sticky situations.
How Far Is It?
It’s about twenty miles there and twenty miles back (forty miles roundtrip.)
How Long Will it Take Me?
For people of reasonable fitness, I recommend dedicating three days for the hike. The best plan seems to be as follows
Day 1: Be to the trailhead (eight-mile lake on the Stampede Road) about noon. Hike into the Teklanika River, about ten miles, and set camp.
Day 2: Wake up good and early, about 5am, and cross the Teklanika. (We’ll talk more about this later.) Hike out to the bus and back, about twenty miles, in one day. Camp at the Teklanika again, this time on the side closest the bus.
Day 3: Wake up early again and cross the Teklanika. Hike out to your car. Drive to Lynx Pizza in Denali and get some food that doesn’t require you to add boiling water. They also have a beer.
This schedule can be adjusted. If you want to spend a little more time out there or spend a night at the bus site, just turn Day 2 into two ten-mile days instead of one twenty-mile day. Unless you are a truly stellar backpacker though, I wouldn’t recommend trying to make the trip any shorter than three days. For one, it makes it much more difficult to time your river crossings. When I was out there though, we did see a pair of Germans who were running the whole trail in one day. Those guys were machines though.
What Should I Bring?
Not surprisingly, the kit you should bring is not unlike the one you should pack for most other Alaskan backcountry trips.
Pack: Having a comfortable pack is crucial for a hike of this length. I’m partial to Gregory brand packs, but many other brands make great packs. Just don’t try to save money by buying the thirty-dollar Wal-Mart special for this trip. Your shoulders will regret it.
Tent: For the summer, a good sturdy three-season tent is plenty. Make sure your rain fly is functional. The weather can turn cruddy in the blink of an eye up there. Bring some extra para-cord for making anchors (by tying it around sticks and wedging them between river rocks) as otherwise it may be difficult to stake out along the river.
Sleeping Bag: A twenty-degree bag should be adequate for the summer months. Consider upgrading to a zero-degree bag if you are going in the early season (May) or late season (September.) Temps frequently drop into the forties at night, even during July. Make every effort to keep your bag completely dry (especially if you use a down bag.) Put your sleeping bag in a dry sack inside your pack.
Water: There’s water everywhere you turn around on this trail. You’re constantly crossing streams. You don’t need to bring much with you. A single one-liter bottle will be enough if you filter/purify water as you go. This dramatically reduces the weight of your pack.
Food: Packing dehydrated food (Mountain House, Backpacker’s Pantry, etc) will keep the weight of your pack down. Another just add water meal, that’s much cheaper, are the Knorr (formerly Lipton Brand) pasta side meals. They are available at Fred Meyer Grocers (in Anchorage, Palmer, Wasilla, and Fairbanks.) So no matter where you fly into, you’ll be able to find them. Bring plenty of snack-type stuff. It’s important to keep your energy up. Beef jerky, trail mix, raisins, craisins, powerbars, etc all make great food you can keep in a pocket.
Other Stuff (but by no means everything):
flashlight – Alaska may be the land of the midnight sun but you’ll still want a light
knife
para-cord – for stringing a bear bag
bear-proof container – an alternative to stringing a bear bag
toilet paper
small plastic trowel
tons of socks
a few feet of duct tape
fire starter
camp stove and cookware
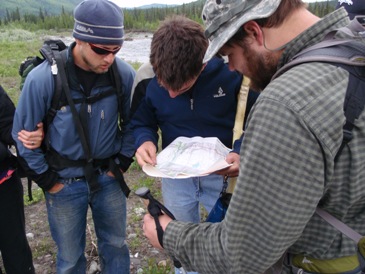
a map
a compass
a camera
What Should I Do About Bears on the Stampede Trail in Alaska?
The absolute BEST thing you can do about bears (and just a good idea in general) is to travel in a group. Bears just don’t attack big groups of people. According to Stephen Herrero’s book, Bear Attacks: Their Causes and Avoidance, bears will rarely attack a group of three or more. A group of six or more has never been attacked.
Some evidence supports the use of bear bells. The human voice is generally accepted to be a much more effective bear deterrent though, so singing, or talking loudly is advisable.
Don’t cook in your camp. Don’t eat in your camp. Don’t bring your food (or trash) into camp. If you are having a campfire, burn what you can, bag what you can’t, and put it into your bear bag, or your bear-proof container.
String a bear bag ten to fifteen feet off the ground and at least six feet out from the trunk of the tree. Leaning trees work best.
As far as personal protection, I personally carry a gun. I realize many people have objections to firearms, don’t like the inconvenience of traveling with them, or just don’t own them. Only bring a gun if you are well-practiced with it. There’s nothing worse than an injured bear out there. Even if you get away, an injured bear is much more likely to attack someone else in the future.
Consider bear spray. The potent pepper spray is effective at deterring a bear attack, non-lethal, and you need not be as much of a marksman. You can’t fly with it, but it’s available here in Alaska, at lots of retailers.
How Should I Cross the Rivers near the Stampede Trail?
You will encounter two rivers that you will need to cross on the Stampede Trail. The first is the Savage River. The second, and much more serious, is the Teklanika.
The Teklanika River is the river that stopped McCandless from returning to the highway. Its depth can vary greatly depending on factors such as rain, temperature (the hotter it is, the more the glaciers are melting, the deeper it will be,) and time of day. It can be anywhere from knee-deep to chest-deep, and the current is quite strong.
Less than a week before the writing of this article, a Swiss woman drowned while trying to cross the Teklanika. It’s deadly serious. If it looks really bad and you are nervous about the crossing, just turn around. There’s no sense losing your life over a hike. There’s nothing in that bus worth dying over. Don’t end up in the paper!
The best time of day to cross the river is very early in the morning. As mentioned previously, the river is glacial, and therefore the level drops during the course of the night due to the lower temperature.
Before crossing, take the insoles out of your boots, and take your socks off. Keep your boots on though. It will help increase your grip and stability on the rock. Taking your pants off is an option you should consider as well. Keeping your pants on will give you only a marginal amount of protection from the cold of the water, but it will increase the surface area that the river has to push against you. Taking your pants off reduces your drag. Undo the buckle on your pack (and sternum strap.) That way, if you fall in and need to free yourself of your pack you will be able to.
It is far better to cross the river in a group than it is to cross alone. In a group, line up with the larger members furthest upstream. Have everyone pick up a long pole and hold it, parallel to the river, across their chests. This way, if someone starts to stumble, the entire rest of the group supports them, and the largest members are upstream breaking the current. Walk slowly, and carefully place each foot.
If you must cross alone, use a long sturdy pole to help you balance. Place the pole upstream from yourself and lean against it. Face upstream, but move in a diagonal line downstream as you move across. Always maintain two points of contact at all times. Again, take your time and be careful.
The use of a rope may help in some instances. The rope she was using, was the big contributing factor in the Swiss woman’s death, however. In that instance, the rope had been incorrectly placed parallel across the river. Also, she had tied herself to the rope with another shorter length of rope. When she fell, the river pushed hard against her, stretched the rope, and she was pinned underwater, held in place by the rope, which was now in a V shape pointing downstream. She was unable to free herself.
To avoid this, if you use a rope, have it at a steep angle across the river. The stretchier the rope (for example, climbing rope) the steeper that angle needs to be. Having an angle will allow a person to use the rope to get back to shore if they fall, and will keep the rope from forming a V. It is also a poor, and potentially lethal, idea to tie yourself to the rope. Simply use it as a handrail.
If you are swept downstream, do not panic, keep your face up, and your feet pointed downstream. Work your way to the bank as quickly as possible.
It is also worth noting that the Teklanika braids out as you head further south along it’s bank from the trail (upstream). You may want to head in that direction in search of a safer place to cross.
Another method of crossing you could investigate, would be the use of a pack raft. There are places in Alaska that rent them and it could be a much safer alternative to fording. I have no personal experience with that method so I am not able to comment much further on it.
How Bad Are The Bugs?
The bugs are terrible. The mosquitoes will swarm you. Bring plenty of bug repellent.
What About Footwear? How Can I Keep My Feet Dry?
With the number of stream crossings on this trail, it would be nearly impossible to keep your feet dry the whole time. In my group of eight, no one was successful in that goal, though a few tried pretty hard.
The best thing to do is just accept the fact that your feet will be wet all day. Take care of your feet though. Each night make sure to dry your feet thoroughly. Bringing a pair of thick wool socks for each night is a great idea as well. Only put them on right before you get into your sleeping bag. This will keep your feet warm and dry for at least eight out of every twenty-four hours, and because it’s one of the main places your body loses heat while you sleep, it effectively increases the temperature rating of your sleeping bag as well.
I also suggest bringing along a pair of cheap, light, foam flip-flops. That way you can wear them around camp while your boots sit next to the fire drying.
Any Other Advice?
Be super careful. Nobody wants to hear about anybody else getting hurt out there. Be Prepared, do your homework, use good judgment, and come home alive.
Trail Reports and Photos
I’m always looking for current trail reports and photos, so feel free to get ahold of me when you get back. I’d love to chat.
Stampede Trail Flickr Group
http://www.flickr.com/groups/stampedetrail/